My Windows Terminal Configuration
The week before the last week, when I was at home connected to remote machine, it suddenly came to me that I should learn more about the shell I’m using: Windows Terminal. As a result, I started to collect information on the internet and configure my terminal.
When doing experiment on remote machines, I’d prefer to use built-in shell rather than VScode integrated shell. The motivation is simple: I like a bigger full-screen terminal, and I think VSCode is just a code editor (easier than Vim). When tons of experiments are running, I think a stand-alone terminal is more efficient than VSCode integrated shell.
First of all, I learned some shortcuts for basic control of Windows terminal.
Shift Alt +: Duplicate a new panel in the right. (horizontal split)Shift Alt -: Create a new panel in the bottom. (vertical split)Alt LeftArrow: Move the focus to panel in the left.Alt RightArrow: Move the focus to panel in the right.Alt DownArrow: Move the focus to panel in the bottom.Alt UpArrow: Move the focus to panel above.Ctrl Shift W: Close current terminal.Ctrl Shift T: Create a new terminal in a new page (useCtrl + Tabto switch between).Ctrl ,: Open setting with UI.Ctrl Shift ,: Opensetting.json.
These are the most useful shortcuts for me. I’m accustomed to split the terminal into 4 smaller panels once I start it. This is really useful on a large screen (e.g. my 3840x2160 screen at home).
At first, I wanted to install a omz-like plugin for my powershell, and found omposh. But I soon realized that the only usage of my Windows terminal is to connect to remote machines via ssh or test locally with wsl, so I gave up. Nevertheless, following the instruction of omposh, I still install some fonts needed by omz. In the past, my default Windows OS lack some icons necessary for powerlevel10k (a theme for zsh), so I can’t exploit the full potential of it. Now, my computer is equipped with the nerd font, and everything is going well. Particularly, if you want to enable this font in your integrated shell in VScode, just update the setting terminal.integrated.fontFamily (you just need to add a line in your VSCode setting.json). I myself randomly choose Inconsolata Nerd Font.
The most important thing for a terminal must be a beautiful background. We just need to change the defaults field of profiles.
1 | "profiles": |
You can find more detailed configuration here. For me, setting opacity of terminal is never a wise choice, since we can use Ctrl + Shift + Scroll to adjust the opacity of the terminal manually. In 99% cases, I won’t take any advantage of the opacity and opacity will just mess things up (lessons learnt from my VSCode configuration).
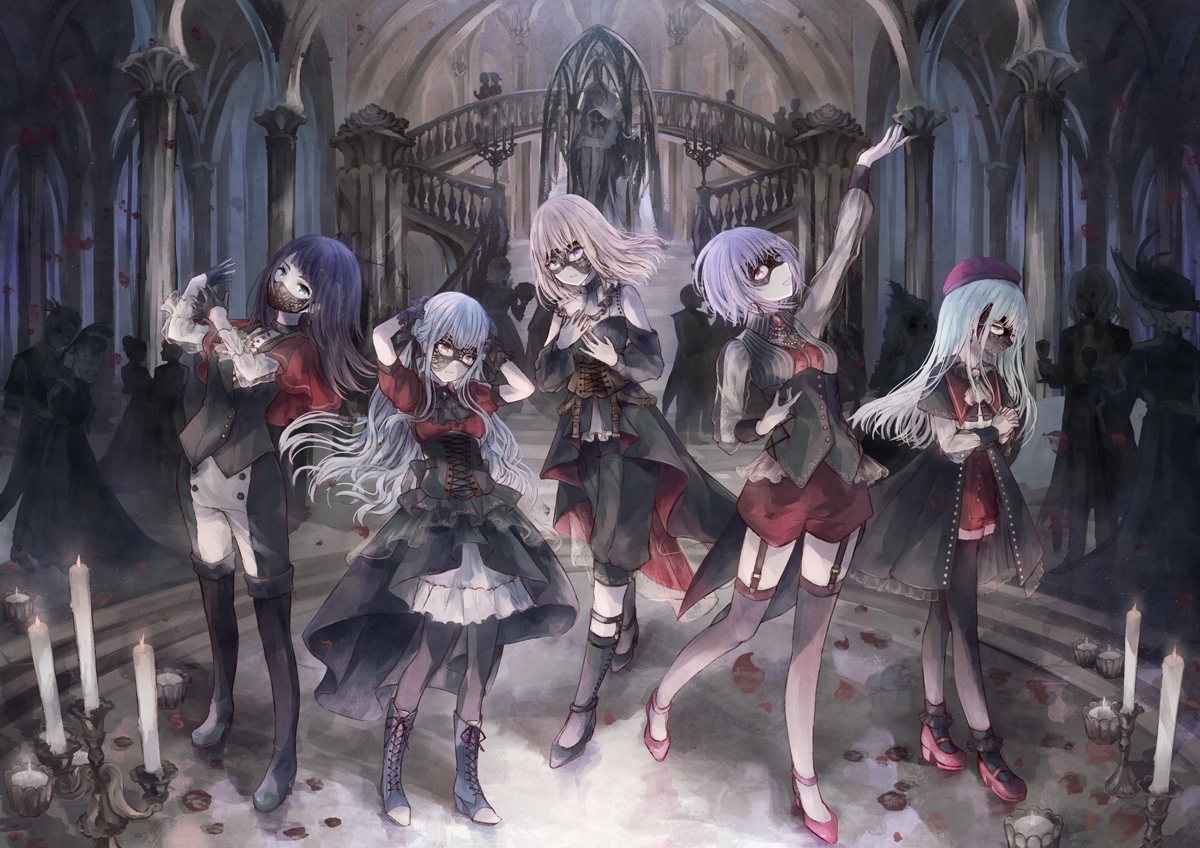
My background photo is this one, just as the front cover of this post:

You can find the original artwork here in pixiv.
 Wechat